|
|
| Line 19: |
Line 19: |
| | == Production == | | == Production == |
| | | | |
| − | - Dave: the last two wire frames populated. The only remaining operation is to deaden three wire planes. The extra spare cathode type-2 is tensioned, but the cards are not installed by purpose | + | - Dave: the last two wire frames populated. The only remaining operation is to deaden four wire planes. The extra spare cathode type-2 is tensioned, but the cards are not installed yet by purpose (for easy storage). |
| | | | |
| − | - On Friday package #1 was moved from 126 to Blue Crab and then package #2 - from Blue Crab to 126. After connecting #1 to Nitrogen it was found cell #5 is leaking; turned out the barb connector for the guage tube was loosely connected. These connectors are glued initially with super glue, but later on some of them (and not on this one) green epoxy was added. Casey was able to glue a new barb connector (not easy to reach the spacer ring since you have only 5mm between the cathode and the wire frame) and fixed the problem. Then green epoxy was added on all the connectors of packages #1 and #4 that didn't have it before (5 out of 12). Bill wants to try with Casey using shoe glue that better sticks to polyethylene. | + | - Package #3 repair: last Friday we started testing the top cell (after we opened it once and removed a lint) and it was tripping again. On Monday we opened the package for a second time and looked more carefully: there were some small balls on two sense wires and section of a field wire that looked suspicious. We tried to clean these places and closed the package, turned out again without success. Troubleshooting the problem is difficult because it appears from time to time once per several hours. The dark currents are very low, there's no constant noise and we can't localize the problem. We decided to open the package tomorrow morning, put the wire frame on the stringing table at 90deg (Bill's idea) and scan the wires with the camera. We will clean if possible, or replace the bad wires and next week will give it another try. If it still doesn't work, we will put a new wire frame (# |
| − | | + | |
| − | - Package #3 repair: on Tuesday hubs were installed on the top side and the package put upside down on the installation table. To access cell #6 we had to remove only the end window and the bottom cathode (type-3). We found 1-2mm hair/lint on a field wire in HV sector 2, exactly where the HV problem was. After removing it we closed the package and started flushing it. It took only 4 people for two hours for this operation, but placing back the ground clips, pre-amps, cooling tube (all had to be removed) and restoring the HV connections will take much longer. The plan is to start testing the package tomorrow.
| + | |
| − | | + | |
| − | - Pictures on the copper side of the cathode type-3 from package #3 are linked above. There's again some discoloration in the area that sits against the G10 of the wire frame. We had this when keeping the cathode moist over night when we started the production. One can see the G10 fiber pattern, so the explanation could be that some moisture got trapped there, most likely when there were AC problems in 126; this package was there for many months before the two new AC units were installed. From previous experience we know the copper is still conductive even it changes color.
| + | |
| | | | |
| | == Installation == | | == Installation == |
Revision as of 15:59, 21 March 2013
March 21, 2013 FDC meeting
Agenda
- Production Construction Tracking (Dave)
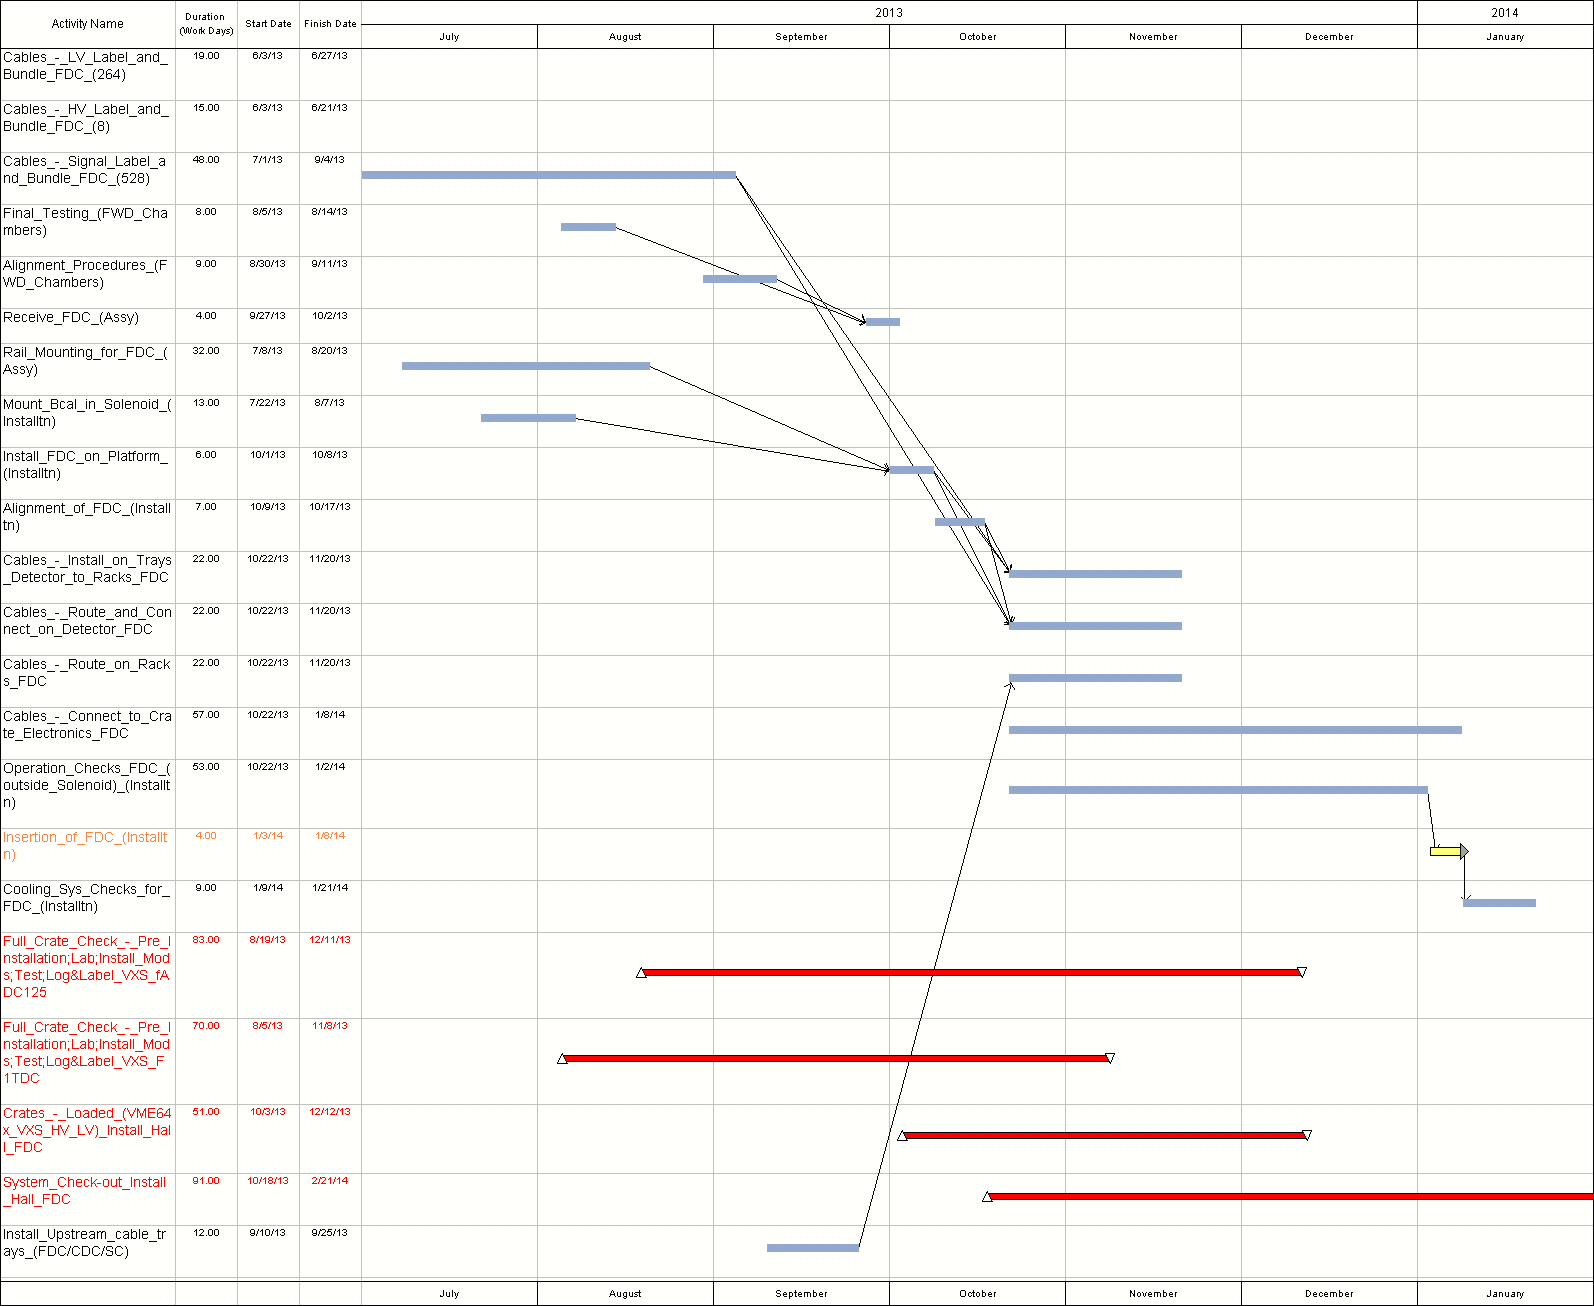
- Installation schedule(Lubomir)
- Engineering (Bill)
- Cooling manifold installation and tests
- Electronics (Chris, Nick)
- Tests at EEL126 FDC E-log (Beni)
- Other