Difference between revisions of "Mini-BCAL Update June 19, 2012"
From GlueXWiki
(→Second Layer) |
(→Third Layer) |
||
| Line 19: | Line 19: | ||
== Third Layer == | == Third Layer == | ||
| − | # 1st SiPM [[File:RatioTrigger3_1.png|300px]] | + | # 1st SiPM [[File:RatioTrigger3_1.png|300px]]0:450 |
| − | # 2nd SiPM [[File:RatioTrigger3_2.png|300px]] | + | # 2nd SiPM [[File:RatioTrigger3_2.png|300px]]0:600 |
| − | # 3rd SiPM [[File:RatioTrigger3_3.png|300px]] | + | # 3rd SiPM [[File:RatioTrigger3_3.png|300px]]8:15 |
| − | # 4th SiPM [[File:RatioTrigger3_4.png|300px]] | + | # 4th SiPM [[File:RatioTrigger3_4.png|300px]]13:34 |
| − | # 5th SiPM [[File:RatioTrigger3_5.png|300px]] | + | # 5th SiPM [[File:RatioTrigger3_5.png|300px]]2:5 |
| − | # 6th SiPM [[File:RatioTrigger3_6.png|300px]] | + | # 6th SiPM [[File:RatioTrigger3_6.png|300px]]11:25 |
| − | # 7th SiPM [[File:RatioTrigger3_7.png|300px]] | + | # 7th SiPM [[File:RatioTrigger3_7.png|300px]]4:9 |
| − | # 8th SiPM [[File:RatioTrigger3_8.png|300px]] | + | # 8th SiPM [[File:RatioTrigger3_8.png|300px]]6:17 |
| − | # 9th SiPM [[File:RatioTrigger3_9.png|300px]] | + | # 9th SiPM [[File:RatioTrigger3_9.png|300px]]7:15 |
| − | # 10th SiPM [[File:RatioTrigger3_10.png|300px]] | + | # 10th SiPM [[File:RatioTrigger3_10.png|300px]]1:3 |
Revision as of 15:14, 18 June 2012
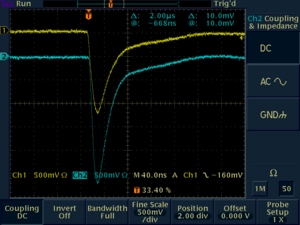
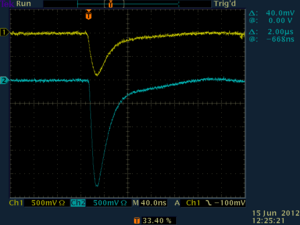
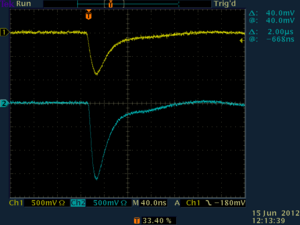
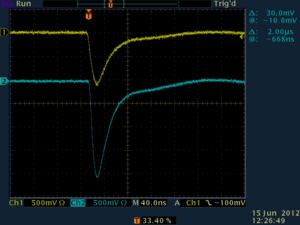
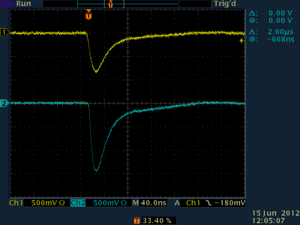
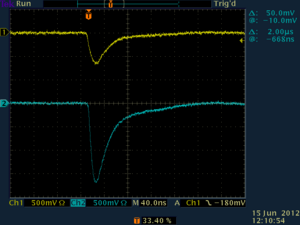
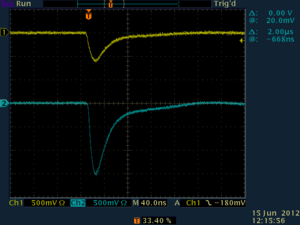
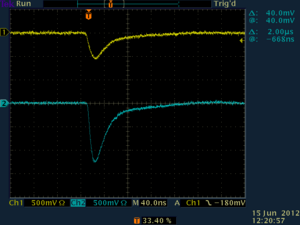
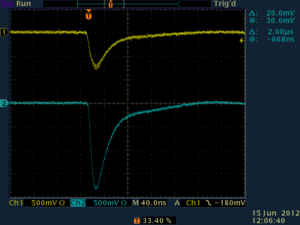
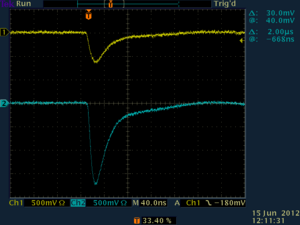
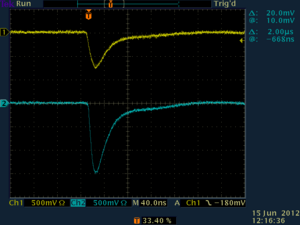
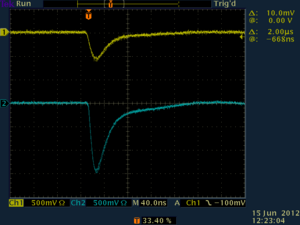
Ratio
Near to far ratios of the twenty SiPM on Mini-BCAL.
Upstream in blue. Downstream in yellow. Trigger voltages set at 6.2V for SiPM 1-9 for both 2nd and third layer while the ninth SiPM trigger voltage recorded at 7.5V.
Second Layer
- 1st SiPM
 0:900
0:900 - 2nd SiPM
 0:1500
 - 3rd SiPM
 13:16
13:16 - 4th SiPM
 3:7
3:7 - 5th SiPM
 1:3
1:3 - 6th SiPM
 9:23
9:23 - 7th SiPM
 5:11
5:11 - 8th SiPM
 9:16
9:16 - 9th SiPM
 1:2
1:2 - 10th SiPM
 11:21
11:21


Third Layer
- 1st SiPM
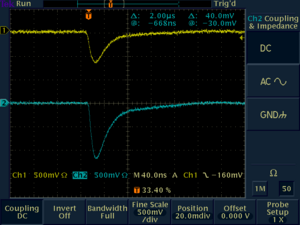 0:450
0:450 - 2nd SiPM
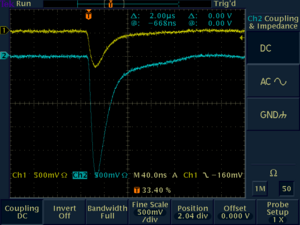 0:600
0:600 - 3rd SiPM
 8:15
8:15 - 4th SiPM
 13:34
13:34 - 5th SiPM
 2:5
2:5 - 6th SiPM
 11:25
11:25 - 7th SiPM
 4:9
4:9 - 8th SiPM
 6:17
6:17 - 9th SiPM
 7:15
7:15 - 10th SiPM
 1:3
1:3


