Difference between revisions of "Glue light guide to the PMT"
From GlueXWiki
| Line 17: | Line 17: | ||
* Switch on UV gluing tool. Cure UV glue from the top and two sided. The typical light exposure time is 6 sec for each side | * Switch on UV gluing tool. Cure UV glue from the top and two sided. The typical light exposure time is 6 sec for each side | ||
* Slide the PMT with LG to the bottom of the fixture | * Slide the PMT with LG to the bottom of the fixture | ||
| + | |||
| + | [https://halldweb.jlab.org/detectors/fcal2/module_fabrication/lg_gluing.pdf Gluing procedure] | ||
Latest revision as of 12:15, 2 August 2022
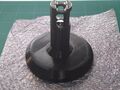
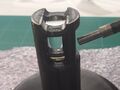
Gluing fixture
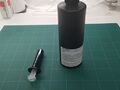
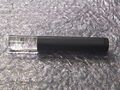
DYMAX glue loaded to the syringe
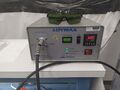
DYMAX BlueWave curing tool
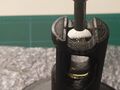
Cure UV glue from the top of the LG
Cure UV glue from the sides
Light guide glued to the PMT


Warning: UV protection glasses (see Fig. 3) have to be used during UV gluing prcedure
- Clean the PMT face with isopropanol and insert it inside the gluing fixture, slide the PMT up from the bootom
- Make sure that DYMAX UV glue is loaded to the syringe
- Apply one drop of the glue on the PMT face
- Make sure that the light guide surface is clean
- Slide the light guide from the top and put in contact with the PMT. Make sure that there are no air bubbles in the glue between the PMT and LG
- Switch on UV gluing tool. Cure UV glue from the top and two sided. The typical light exposure time is 6 sec for each side
- Slide the PMT with LG to the bottom of the fixture